Transform A Dark Dresser with white For A Calm Vibe.
Last Updated on May 16, 2025 by Maria Brittis
If you’ve ever wanted to lighten up a heavy, dark piece of furniture, this step-by-step guide will show you exactly how to paint a dark dresser white and give it a fresh, nature-inspired feel.

Covering The Dark Color
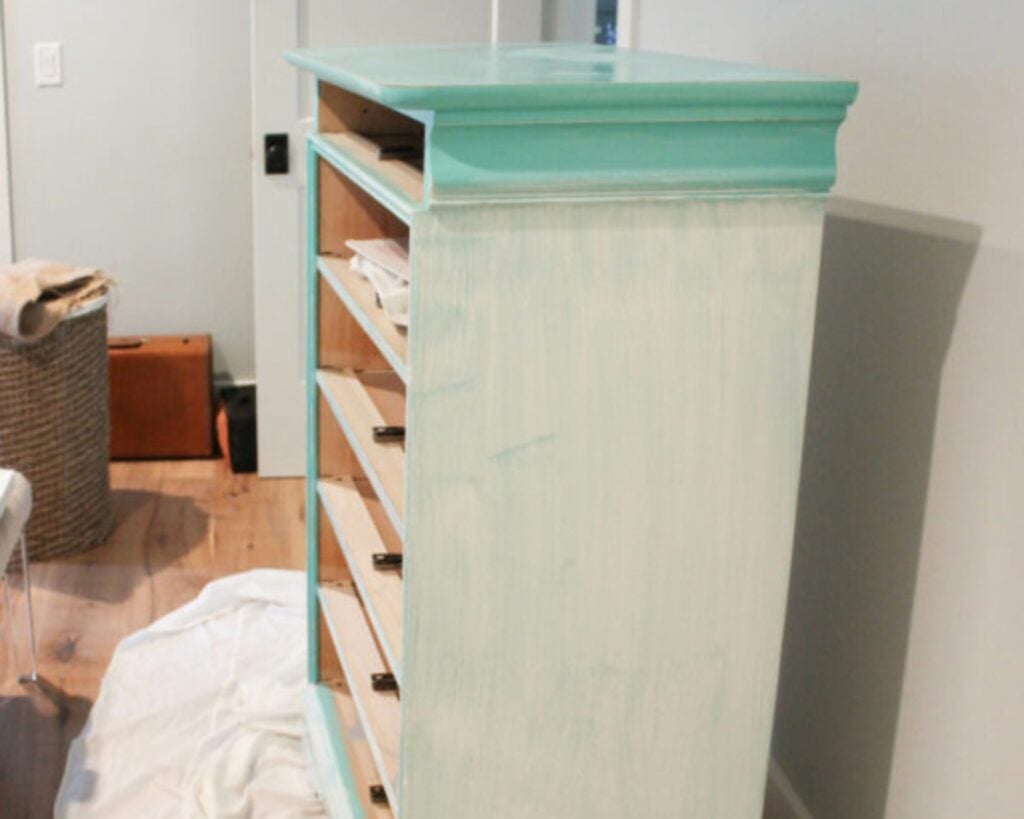
Before: The Dark Dresser. I had a bright turquose color dresser that was to bright with my decor so I decided to change it to more of a natural color.
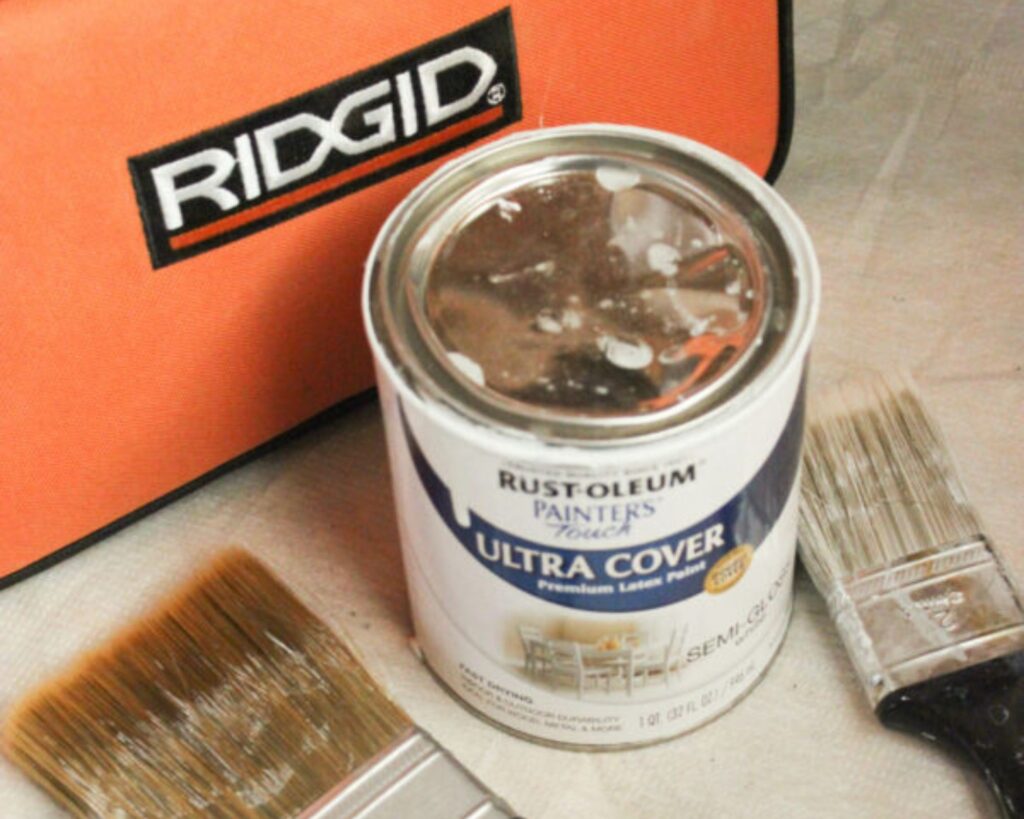
Supplies You’ll Need For White Dresser Makeover
- Sandpaper
- Brushes or rollers
Step-by-Step: White Dresser Makeover
Clean:
Begin by lightly sanding the entire surface of the dresser. Make sure to cover all areas, including the top, sides, front, and even the legs if applicable. Use gentle, even strokes with fine-grit sandpaper to remove any existing finish, smooth out imperfections, and create a slightly rough texture that will help the new paint or stain adhere better. After sanding, wipe down the dresser with a clean, damp cloth to remove any dust or debris before proceeding to the next step.
Sanding :
Before you begin sanding, make sure to thoroughly clean the dresser. Start by removing any dust, dirt, or grime from the surface using a soft cloth or a mild cleaning solution. Pay close attention to corners, crevices, and any detailed areas where debris might accumulate. This step is crucial because any remaining particles can interfere with the sanding process, potentially causing scratches or an uneven finish. Once the dresser is completely clean and dry, you can proceed confidently with sanding, ensuring a smooth and professional-looking result.
Prime:
After you have finished sanding, take the time to thoroughly clean off all the sanding dust. Use a vacuum or a tack cloth to ensure that every bit of dust and debris is removed from the surface, as any residue can affect the adhesion of the primer and the final finish. Once the surface is completely clean and dry, prepare to apply the primer. Choosing a high-quality primer is essential, especially when dealing with a bold color like dark turquoise. Applying a suitable primer will create a uniform base that not only helps paint adhere better but also makes it significantly easier to conceal the dark turquoise color, reducing the number of topcoat layers required. Allow the primer to dry completely before proceeding with the next steps in your painting project.
Paint:
After completing the primer, it’s time to begin the painting process. Start by applying the first layer of paint evenly across the surface using a high-quality brush or roller, depending on the area you are covering. Make sure to use smooth, consistent strokes to achieve an even coat. Allow this first coat to dry thoroughly. Once the first coat is completely dry, lightly sand the surface using fine-grit sandpaper to smooth out any imperfections or rough patches that may have formed during the drying process. After sanding, it’s important to clean off all the dust and debris using a damp cloth or tack cloth to prevent particles from affecting the smoothness of the next layer. Proceed to apply the second coat of paint with the same careful technique. Again, allow this layer to dry thoroughly. If needed, repeat the sanding and dust-cleaning process before applying a third coat. Typically, two to three layers of paint are sufficient to achieve a rich, durable finish.
Completing the process with a sealant to achieve a soft, matte finish that enhances durability and appearance.
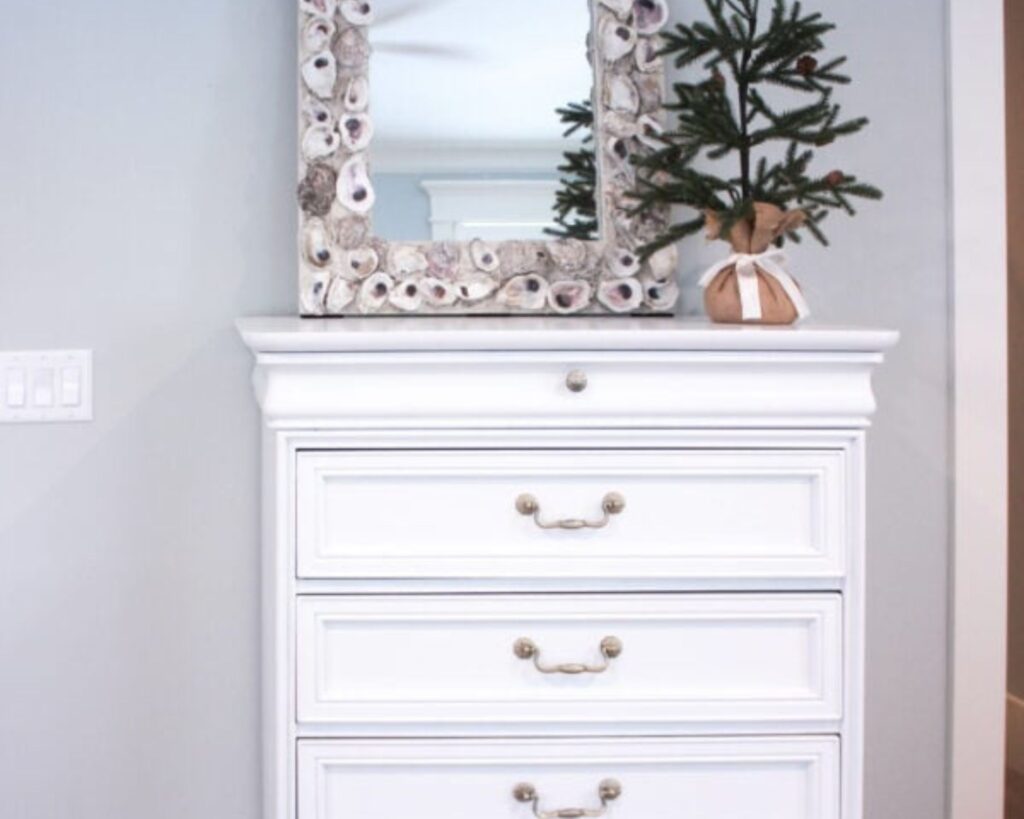
Styling Your White Dresser with Nature-Inspired Decor
I placed an oyster shell above the dresser for a touch of natural charm, and during the holidays, I brought in a small real Christmas tree to keep things simple and earthy.
Similar Posts
How To Refinish Outdoor Wood Furniture
How To Strip Paint From Old Wood Furniture
4 Insanely Awesome Steps To Painting An Upholstered Ottoman
Pin this

This is so beautiful and the color is really amazing. i just love it. Thanks for the share.
Thanks so much for stopping by. Glad you like it
The white is so refreshing, very pretty! Pinning!
Thanks Roxeanne.
Amazing work!! Looking for more from you.
This is one of the best blogs I have read on this topic.