Detailed Guide On How to Wallpaper A Small Bathroom
Last Updated on April 17, 2026 by Maria Brittis
Wallpapering bathrooms are pretty difficult. Here is a detailed guide on how to wallpaper a small bathroom.
How To Wallpaper A Small Bathroom
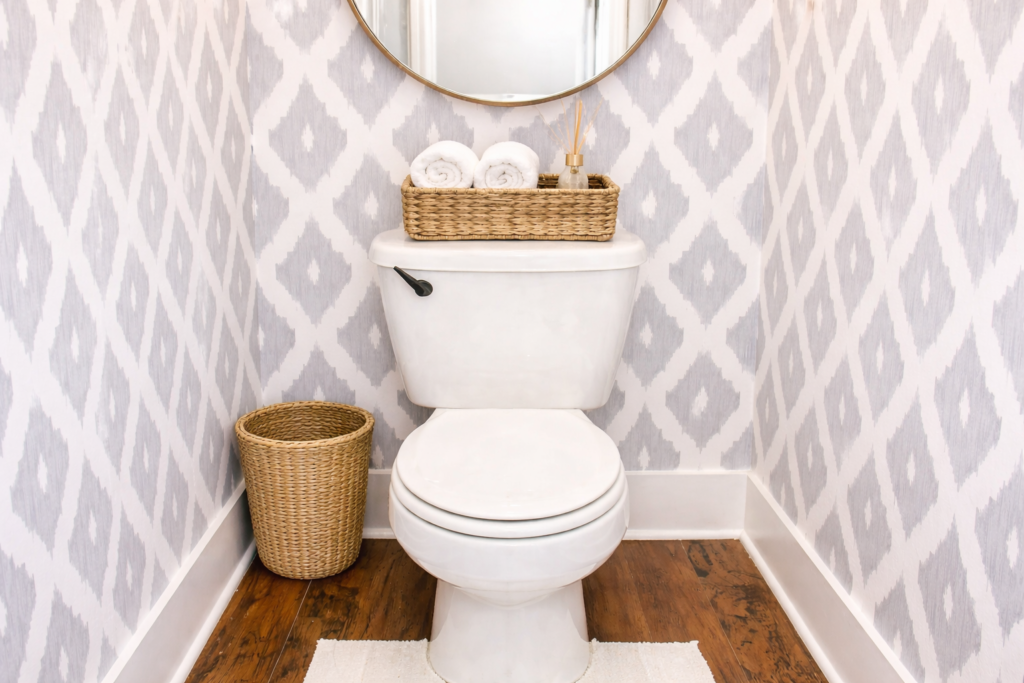
I have been quite nervous about wallpapering my daughter’s half bathroom. The walls are so uneven and even with paint it looked uneven. I thought it would be fun to get out of my comfort zone of only wallpapering simple walls that have no crazy angles or hard to reach areas. After some researching I had a plan
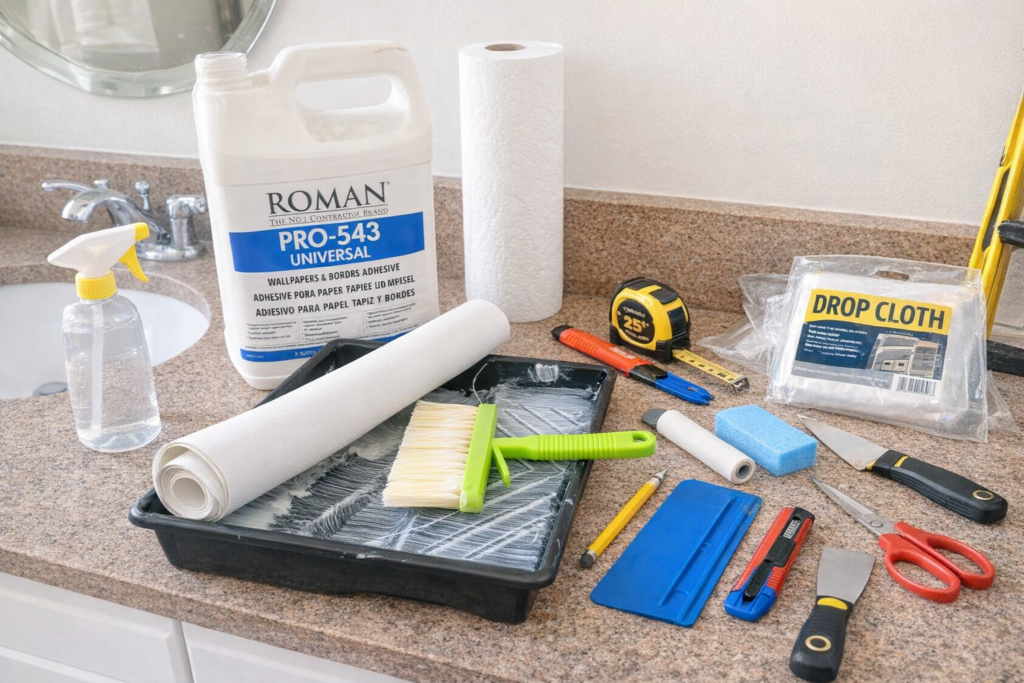
Material Needed
I calculated the square footage of the bathroom which was 300 square feet of walls and each roll of the paper I found is 56 square feet so I needed at least 6 rolls. (Disclosure: This post contains affiliate links where I make a small commission.)
Detail Guide On How To Wallpaper A Small Bathroom
Step 1:Cutting the paper
Measure from the top to the bottom of the walls and add 2 inches on top and bottom. So the walls were 120 inches long so I added 2 inches on top and two inches on bottom. Those extra inches will help when you are putting up the wallpaper and matching up the pattern.
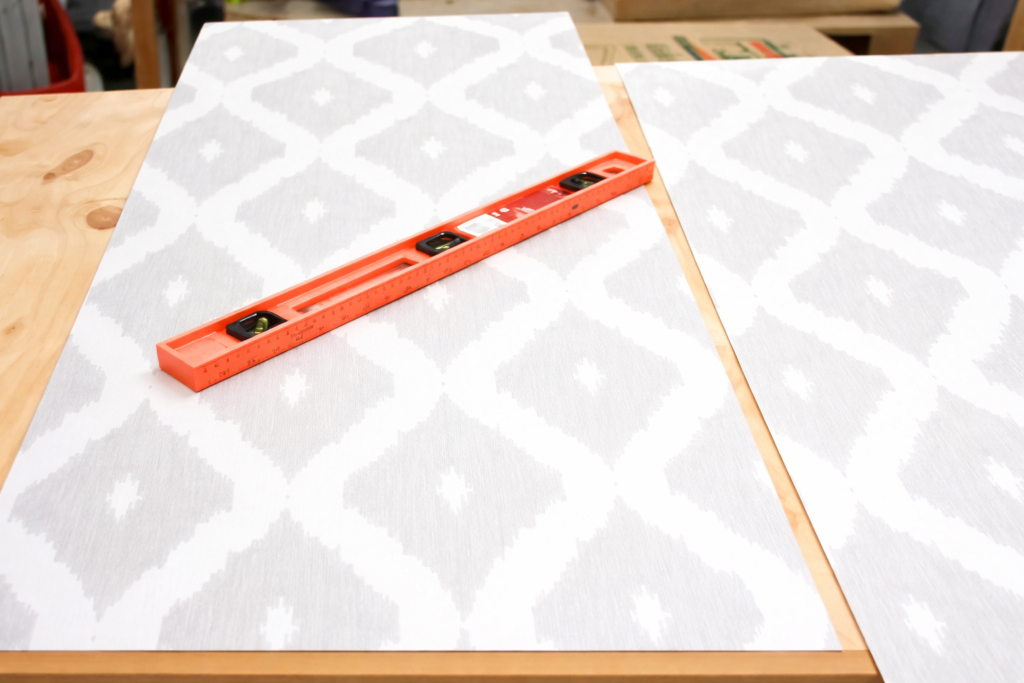
Step 2: Drawing the Plumb Line
This is the line you have to draw vertically all the way around the walls to match up the wallpaper evenly. With a level on the wall draw the width of the wallpaper and the length as well, add one inch to the width. The wallpaper was 24 inches so I had to add 1 inch to compensate for extra space I may need.

Step 3: Keeping it Organized
With a pencil name each strip of wallpaper you cut with a letter from A-Z. This order will make it easier to match up the wallpaper. Make sure you are matching the patterns before you put it up.

Step 4: Pasting Wallpaper
Pour the adhesive in a paint tray. With a clean paint brush I coated the walls with a thin layer of adhesive. I only worked with the width of one strip of wallpaper at a time so I would not be rushed.

Step 5: Putting Up The First Sheet
I started from the top and left 2 inches on top and matched the pattern perfectly. With a plastic spatula smooth out the wallpaper along with soft hands until all the wrinkles are gone. I love this wallpaper it’s so easy to work with and matches so easily.
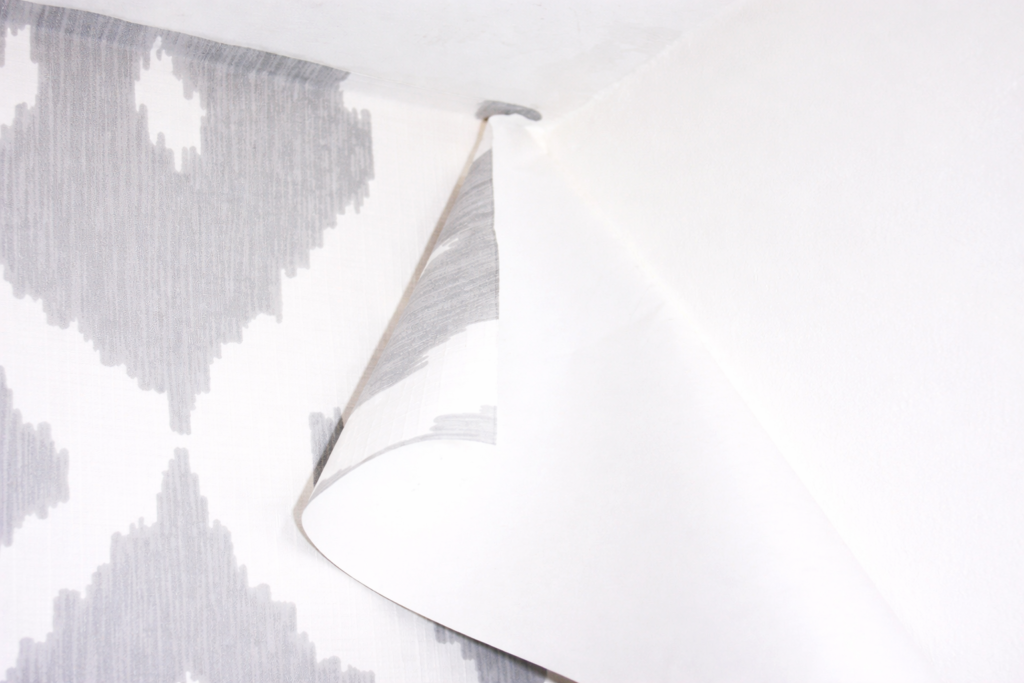
Step: 6: Cutting The Extra Two Inches On Top
With a sharp utility blade and a metal spatula place the metal spatula at the edge and run the blade along the spatula so it cannot cut the wallpaper. Do this all the way along the extra paper until it’s all cut off.

Follow this pattern all the way around the bathroom space. If there are walls that are shorter just cut the strips in half to make easier to move around.
I am super excited with the way the bathroom turned out.

For Similar Posts
How To Wallpaper A Dining Room Video
How To Wallpaper Gender Neutral Bedroom
Pin This For Later

For Wallpaper Sources: https://www.photowall.com/us/wall-murals
Beautiful paper, Maria… and great tutorial! I love doing wallpaper… it’s very therapeutic and gives a sense of accomplishment, don’t you think?
It was a very educational project! I never thought I could do a bathroom, but it turned out better than I expected.
Thanks so much for your words of encouragement.
Maria
Hi Maria!
Great job on the bathroom wallpapering!!! I put up wallpaper in our downstairs powder room at our first house and WOW, walls are NOT PLUMB… Anyway, I wanted to add a tip ~ cut off the wallpaper once it is dry. 🙂 I tried to do it wet and it pulls the paper around on the wall and tears the paper. Just an FYI if anyone is papering for the first time.
Hope your daughter enjoys her new bathroom,
Hugs,
Barb 🙂
True! I did have a struggle at first but needed to use a sharp utility blade and slowly does it.
Maria
Maria this adds so much interest to an otherwise plain room. Great job!
Thank so much Mary! It was not an easy job doing it behind the sink!Wall are easier.
Maria
What wallpaper is this?
https://www.grahambrown.com/us/search/?q=gray+and+white&lang=en_US is the company that supplied me the paper, not sure the design name but I am sure if you search you can find it.
Rather than using a brush to apply the paste, I use a 5 mm roller. It goes on fast and evenly.
Great idea!