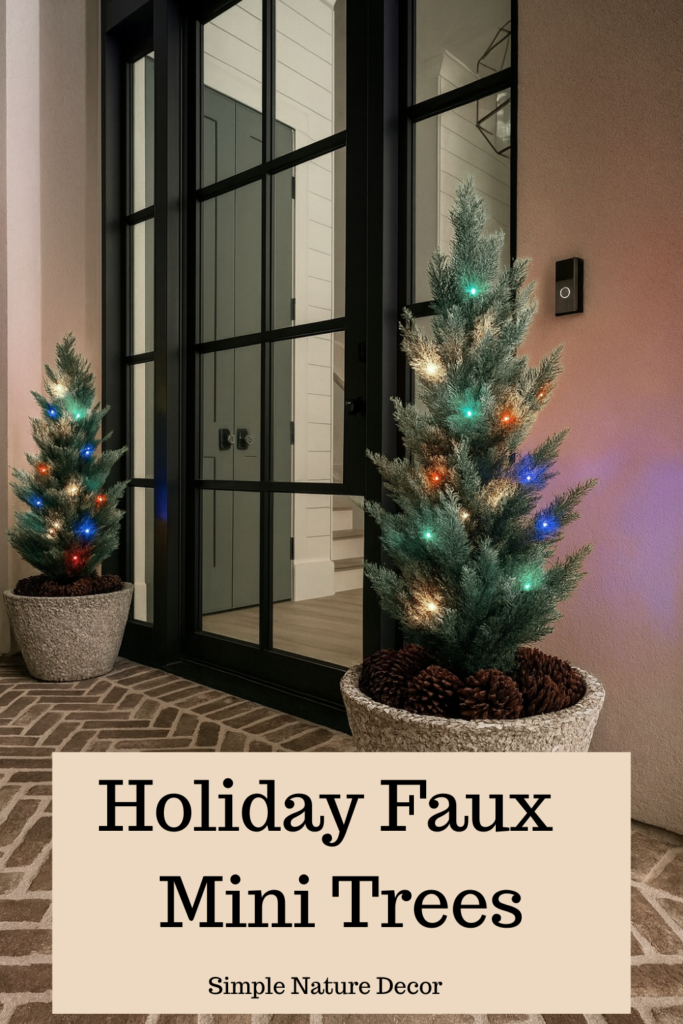
DIY Faux Holiday Mini Trees
Last Updated on January 27, 2026 by Maria Brittis
Diy faux mini trees are adorable mini tree you can decorate your front porch for holidays. These trees are faux and will last all year.

DIY Faux Mini Trees
I have a thing for faux holiday mini trees with lights. I am always looking for ways to incorporate them into my decor. I have used them in centerpieces and festive displays but never as part of a themed dessert presentation.
I am super excited to share this recipe and all the tips I learned to make a raspberry chocolate chip bars.
Tips to Make DIY Faux Mini Trees
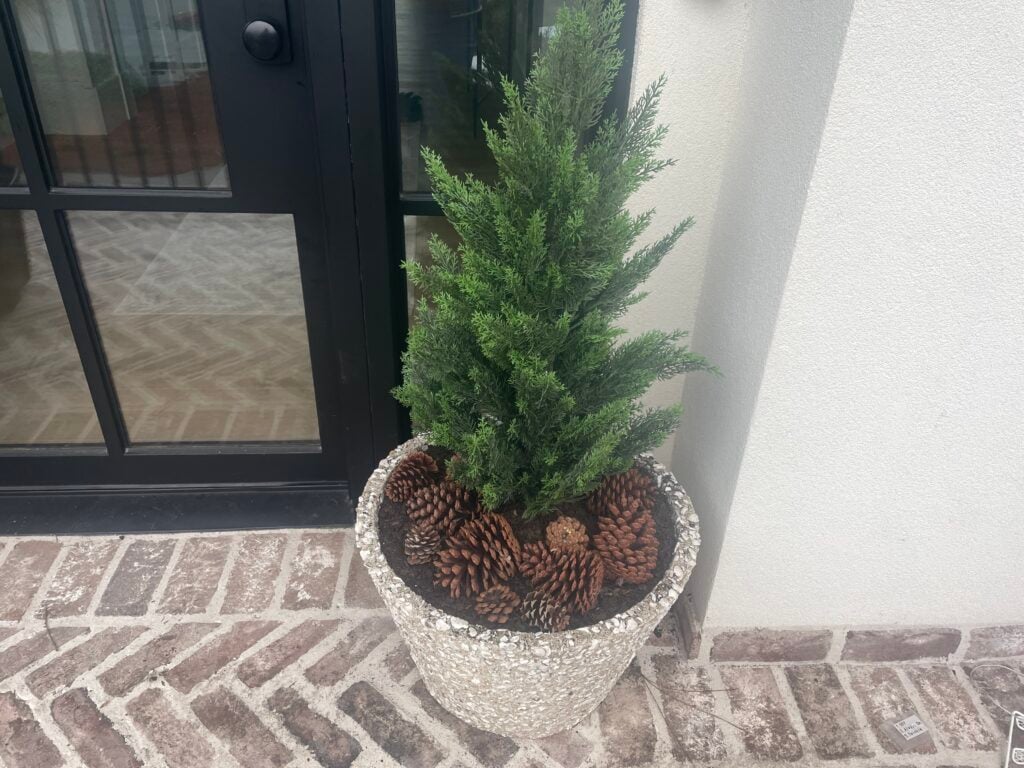
You can use any type of holiday faux mini trees to decorate. If you want to make this even easier, pick up a holiday faux mini tree kit from the store. I used the same style that I prefer for my festive arrangements. The key to making the display vibrant is to fluff the branches after unpacking and ensure the base is secure. In this arrangement, the decorative accents are placed around the trees, not directly on them.
Fluff the tree inside The house
When you receive your tree, it will need to be fluffed out to achieve its fullest and most natural appearance. This process helps the branches regain their shape after being compressed for packaging and shipping. Be sure to wait until the tree has reached room temperature before you begin fluffing it. Attempting to fluff the tree while it’s cold, especially outdoors, can make the branches stiff and more prone to breakage. Bring the tree inside, allow it some time to adjust to the indoor temperature, and then carefully spread out the branches for a beautiful, full look.
Lets Put Together The Faux Holiday Mini Tree
Materials Needed:
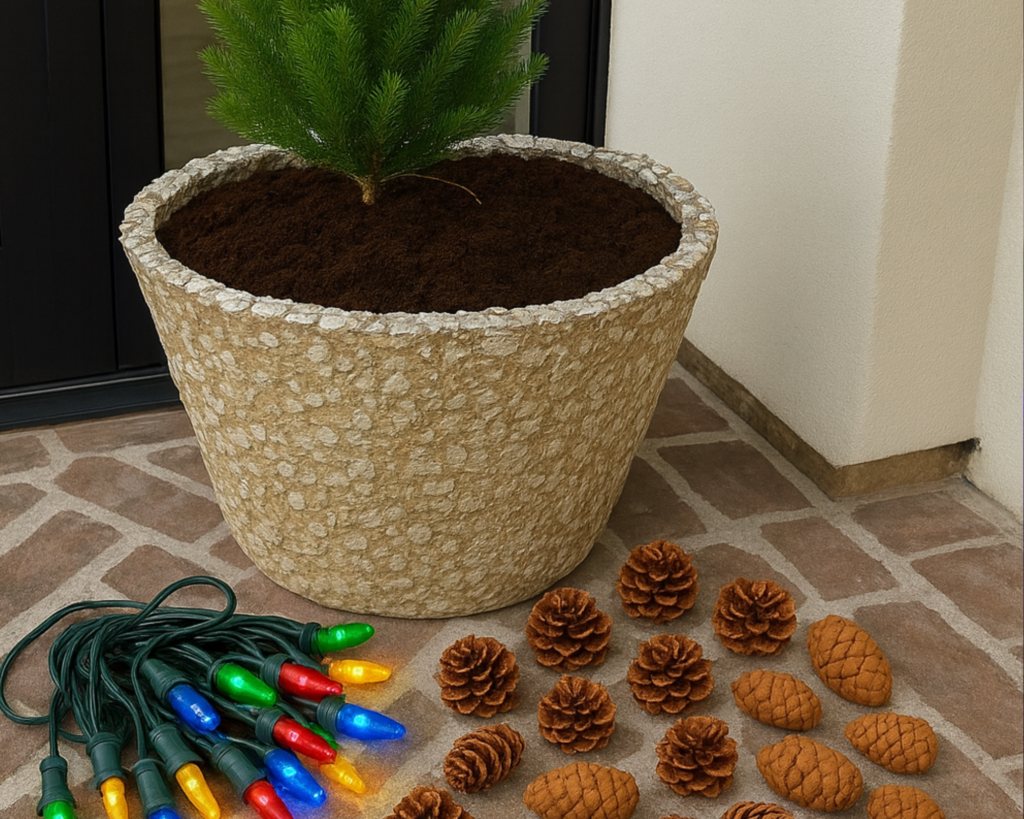
- Potting soil or dirt
- Pinecones
Instructions For DIY Faux Mini Trees
- Prepare the Planters:
Choose two large, sturdy outdoor planters that complement your outdoor space.
2. Add the Dirt:
Fill each planter about three-quarters full with potting soil or dirt. This will provide the base to secure the faux tree and give it an authentic, grounded appearance.

3. Position the Faux Tree:
Carefully place the faux tree in the center of one planter. If the tree is tall or heavy, you might need an extra pair of hands for support.
Adjust the tree so it stands upright and straight.
4. Secure the Tree:
Fill in around the tree’s base with more dirt, pressing firmly to pack it down. This will help stabilize the tree and hold it in place.
Repeat the process if you’re using a second faux tree with the other planter.
5. Add Pinecones for a Rustic Touch:
Arrange pinecones on top of the dirt around the base of the tree. Scatter them naturally to create a rustic, woodland look. Consider using different-sized pinecones for added texture and variety
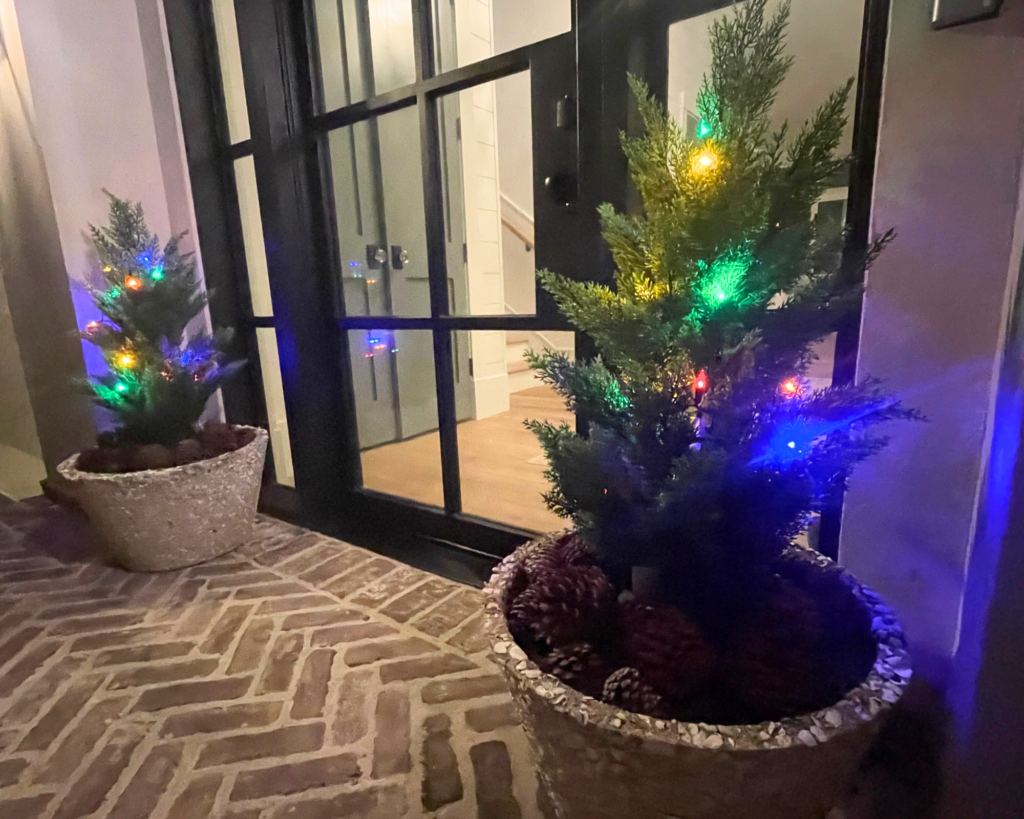
6. Decorate with Colorful Lights:
Wrap colorful outdoor string lights around the faux tree, starting from the bottom and working your way up.
Secure the lights gently to the branches, ensuring even spacing for a balanced look.
If the lights are battery-operated, hide the battery pack under the pinecones or within the planter. For plug-in lights, ensure the cord reaches an outdoor outlet safely.
Step back and assess the overall look. Make any necessary tweaks to the tree’s position, the pinecones, or the lights for the best aesthetic appeal. Turn on the lights in the evening to enjoy the colorful, rustic charm of your beautifully decorated faux tree.
Pro Tips:
Adding a few sprigs of faux greenery or seasonal decorations can enhance the authenticity.
Pin This
For More Like This
The Benefits of Realistic Outdoor Faux Flowers