How To Make An Envelope Clutch Bag
With little sewing experience you can make this stylish easy bag in no time. Get the sewing machine out and learn how to make an envelope clutch bag.

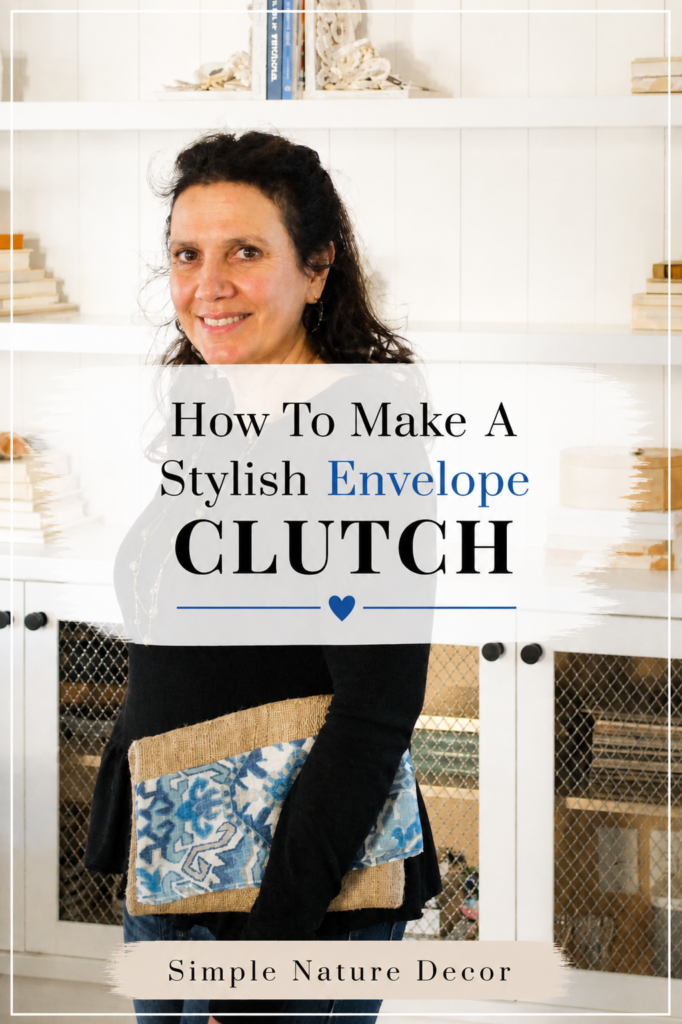
How To Make An Envelope Clutch Bag.
When I was growing up my mom made all my clothes. I was very much influenced by her to learn to sew. I wasn’t as talented as she was but I knew basic things like sewing a hem, making simple dresses and just fun stuff.
Supplies On Making Envelope Clutch Bag:
- Fabric
- Cutting Mat
- Ruler
- Scissors
- Pins
- Sewing Machine (Don’t have a sewing machine try this beginner sewing machine.)
- Measure and cut the fabric

For the main outside fabric I used a coffee bean bag which is made from burlap. I cut one piece at 18 inches long X 12 inches. I placed the fabric on cutting mat and placed the clear ruler over the fabric so I could cut it straight.
For the top part which is the flap I used a contrasting colorful print fabric. I cut two pieces at 12 inches X 5inches.
For the lining I measured 18 inches from the main fabric plus both flaps and it measured 28 inches.

2. Sewing the flaps onto the main fabric
Line up the flaps by pinning the 12 inches to the 12 inches of the main burlap fabric. Make sure the right sides are facing each other. Do this on both sides.

4. Sewing the sides
Now that the flaps are sewn on. You will sew the sides all the way to the top of the flaps. Make sure the opening measures 12 inches. I had to cut off a inch off the sides of the burlap fabric because I miscalculated. 🙁

5. Iron the clutch
Turn the clutch bag right side out and iron the bag.

6. Sewing the lining.
The lining should measure 28 inches from top to bottom, sew the sides before you insert it into the main clutch.

7. Turn the edges
Turn over the top edge of the clutch by a quarter of an inch. You can press it with iron. Repeat the same with the edge of the lining.

8. Insert and sew
Once the edges are turned on both the lining and main clutch. You can insert the lining into the clutch. You will now have to sew them.

9. Sew both edges
Carefully sew them together to form a nice clean edge.

Viola I am very excited with the outcome. I made two clutches in two different fabric. One was canvas and a uphlostered fabric. I loved the upholstered fabric the best. The canvas was hard to iron and frayed at the edges.

10. Add a magnetic clasp
Sewing it onto the burlap part and one on the fabric flap.

For Similar Posts:
How To Make A Coffee Bean Burlap Pillows
Pin This For Later
So beautiful! Such a lovely clutch and I just adore the colors.
Thanks so much, I do love sewing.
Very nice Marie, you made it look so easy. It looks very cool. And I have to give a shoutout to that stunning table. I would give my right arm for one.
Thanks sweet friend, that is from old reclaimed wood.
This is so cute. Sending to my handy daughters! I am not. lol
Thanks so much
Oh that’s so pretty Marie. I’m really loving the pretty blue and whites against the burlap. Such a beautiful contrast
Thanks I do love working with the coffee bags
I need. a small bag for my niece’s wedding. I may have to make one that matches my dress. Thanks for the idea. I don’t do much sewing but I think I can handle this!
Actually this would be perfect, instead of folding it over you can tie a pretty ribbon around the neck of the bag.
Very beautiful Maria. I loved your blog. It is captivating. thanks for sharing.
My mom made all our clothes too! I was so enamoured that I took fashion design as a career (the first of many – lol). Love the use of the burlap; such a nice contrast against the pretty pattern!
Wow so you must be pretty good when it comes to sewing. Thanks
What a darling clutch, Maria. I really like the various textures and fabric prints. I am definitely pinning this to my sewing Pinterest board for future reference. Have a great week!
Wonderful article! We will be linking to this particularly great content on our site. Keep up the good writing.